 Skip to content
 If you have ever looked at your home’s exterior and felt like no amount of gardening could make up for the grime creeping up the siding, you already know it is time to learn how to pressure wash a house. This guide covers everything: the right equipment, PSI settings by surface type, safety rules, environmental regulations, how often to wash, what to avoid, and the real numbers behind why it matters for your home’s value. Whether you are a first-timer or someone who has blasted a few driveways and wants to do it right, this is the guide for you.
Let’s get into it.
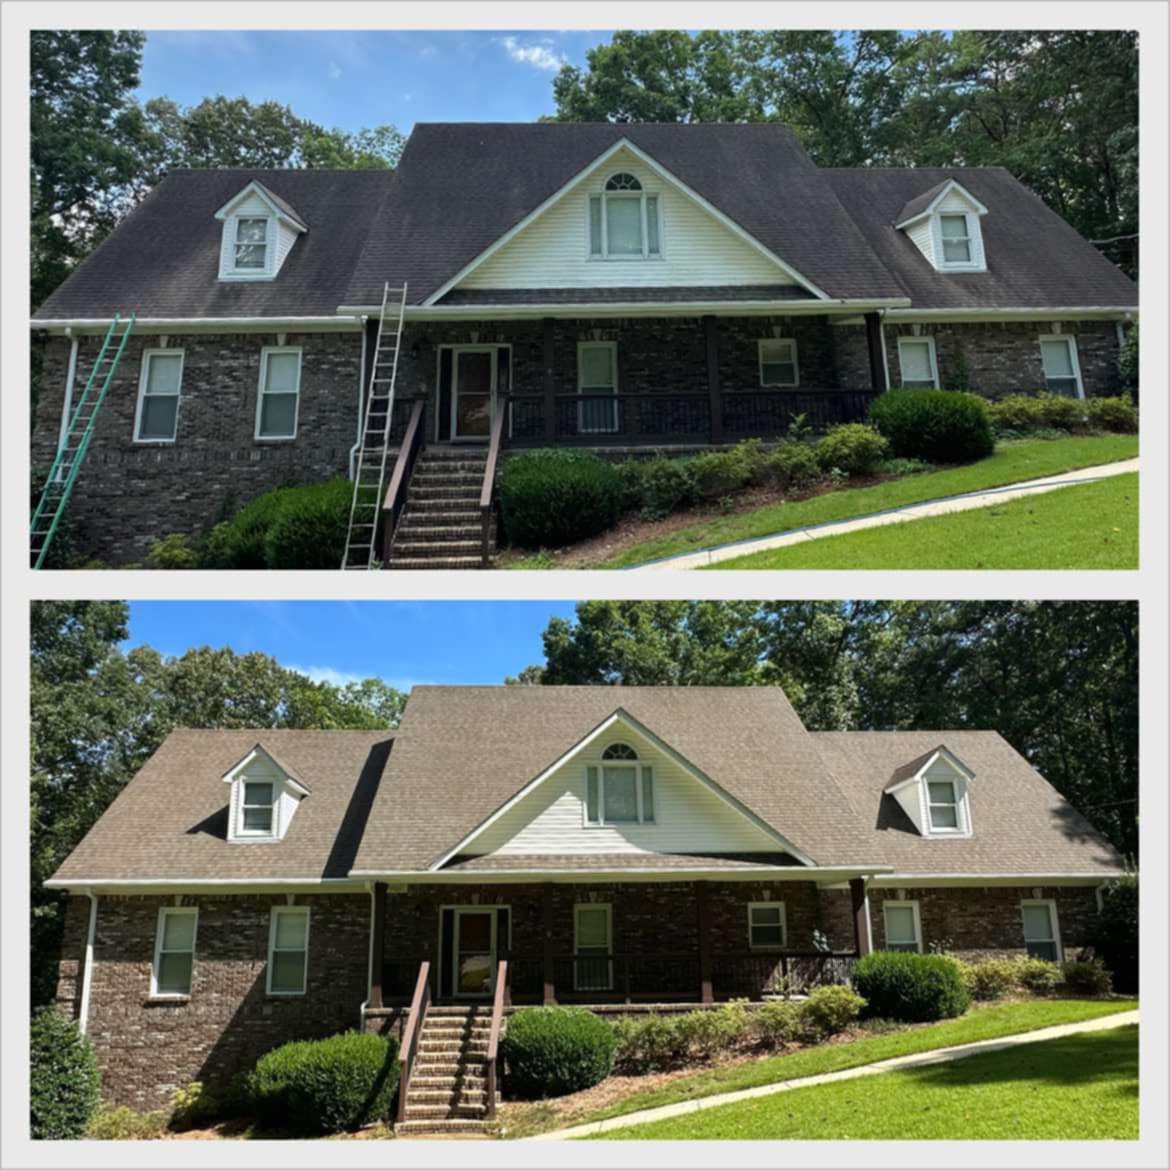
Pressure washing is the process of forcing a high-powered stream of water through a small nozzle to strip dirt, grime, mold, mildew, algae, and other buildup from exterior surfaces. Unlike scrubbing by hand, the force of the water does the heavy lifting, and there are no harsh chemicals needed for most jobs.
The numbers tell a clear story about why this matters. Research published in the Journal of Real Estate Finance and Economics suggests that good curb appeal can raise a property’s value by up to 7%. For a $400,000 home, that is $28,000 in potential added value from what is largely a one-day project.
A 2022 study of 500 home sales found that properties that received professional pressure washing sold 2 to 3 weeks faster, and homes with clean exteriors received offers averaging $15,000 to $20,000 higher than comparable unwashed properties. On top of that, 78% of real estate agents reported faster sales for homes with pressure-washed exteriors.
Beyond resale value, mold, mildew, and algae are not just ugly. Left unchecked, they can degrade siding materials, eat into caulking, stain concrete permanently, and compromise the structural integrity of wood components over time. Regular exterior cleaning prevents expensive repair bills down the road.
Good curb appeal can raise home value by up to 7%
Pressure-washed homes sell significantly faster
Clean exteriors attract higher purchase offers
Stops mold, mildew and algae from degrading materials
The first decision is whether to rent, buy, or hire out. A half-day rental runs around $30 to $80. Buying starts around $99 to $200. Professional services charge between 10 and 80 cents per square foot, putting a typical house in the $150 to $1,400 range.
The key measurement is PSI, which stands for pounds per square inch. Here is a quick breakdown by surface type:
| Surface | PSI Range | Notes |
|---|---|---|
| Vinyl siding | 2,500 - 3,000 PSI | Can handle a gas-powered machine |
| Aluminum, stucco, soft-grain wood | 1,200 - 1,500 PSI | Use a lighter-duty washer |
| Brick | 1,500 - 2,000 PSI | Wide fan nozzle and detergent |
| Concrete driveways/walkways | Up to 3,000 PSI | Heavy-duty cleaning |
| Wood decks | 500 - 600 PSI | Fan-tip nozzle only |
GPM, or gallons per minute, is the second spec to watch. Higher GPM means faster coverage and a wider cleaning path. If you are washing a large two-story home, prioritize a machine with at least 2.0 GPM to keep the job from dragging on all day.
Nozzles are color-coded by their spray angle. The wider the angle, the gentler the spray.
Pinpoint stream. Extremely powerful. Use only on bare concrete, never on siding or painted surfaces. Can gouge wood instantly.
Good for stripping paint or heavy grime from hard surfaces.
The all-purpose nozzle. Best starting point for most house washing jobs including siding, driveways, and walkways.
Gentle. Best for windows, screens, and delicate surfaces.
Low pressure soap tip. Use this to apply detergent before switching to a rinsing nozzle.
For most house siding, start with the 25-degree (green) nozzle and adjust from there. Always test in a hidden spot first before committing to a full wall.
This is the core of how to pressure wash a house properly. Follow these steps in order for best results and to avoid damage.
The ideal temperature range for pressure washing is between 40 and 75 degrees Fahrenheit. Cold temperatures can prevent cleaning solutions from working properly and can cause water to freeze in the pump. Direct summer sun can dry detergent before you rinse it off, leaving streaks. Spring and early fall are the best seasons, specifically after pollen season winds down and before temperatures drop.
Avoid washing on a rainy or windy day. Precipitation will smear the grime right back, and wind can carry detergent overspray onto cars, windows, or neighboring properties.
This step is one that most people skip, and it is the one that causes the most problems.
Connect the garden hose to the pressure washer inlet. Run the hose fully open. A kinked or partially closed hose starves the pump and can damage it. Connect the spray wand, select your starting nozzle (25 degrees for siding), and check all fittings are tight.
If you are using a gas-powered machine, start it outside only. Gas engines produce carbon monoxide, which is lethal in enclosed spaces.
Test the spray on an inconspicuous section of your home first. Check that the distance and pressure settings produce a clean result without leaving marks, scuffing the surface, or stripping paint.
Switch to the black (soap) nozzle or attach the detergent line. Apply detergent from the bottom of the wall upward. This is counterintuitive but correct. Applying top-down allows the soap to run over already-coated sections and can cause uneven saturation.
Let the detergent dwell on the surface for 5 to 10 minutes so it can break down mold, mildew, and grime. Do not let it dry completely. On hot days, work in smaller sections so the soap stays wet.
For brick specifically, pre-soak the surface with plain water before applying detergent. This prevents the porous brick from immediately absorbing the cleaning solution before it has a chance to work on the surface.
Switch to your rinsing nozzle (25-degree green for most siding). Hold the wand 12 to 18 inches from the surface. Too close causes damage, too far reduces cleaning effectiveness.
Use a horizontal, side-to-side spray motion for most surfaces. Avoid spraying at a steep upward angle into siding seams, joints, or overhangs, as water can be forced behind the siding and cause moisture problems.
Here is the important part on direction: for single-story homes, start at the top and work down after rinsing. When applying detergent, start from the bottom. For rinsing, start from the top so clean water washes the soap and grime downward.
For two-story homes, never stand on a ladder with a pressure washer in hand. The recoil force is significant enough to throw you off balance. Use a telescoping wand or rolling scaffold instead. A 12-foot extension wand combined with a rolling scaffold can cover heights up to 24 feet safely.
When cleaning roof overhangs and gutters, maintain a 45-degree angle to the surface.
After pressure washing each section, switch back to plain water and rinse with the garden hose to remove any remaining detergent. Soap residue left on vinyl or painted surfaces can attract more dirt faster and may cause surface degradation over time.
Work systematically around the house in sections rather than trying to do the whole exterior at once. This prevents sections from drying before you get to rinse them.
Release the pressure in the wand by squeezing the trigger after turning the machine off. This makes disconnecting hoses safer. Disconnect hoses in reverse order. Drain the pump as recommended in the owner’s manual before storage, especially in cold climates where residual water can freeze and crack the pump housing.
Remove all tarps, plastic sheeting, and duct tape. Rinse plants and landscaping that may have been exposed to overspray. Allow the home’s exterior to dry completely before painting or caulking, which can take a few hours to a full day depending on the weather.
One of the most common pressure washing mistakes is using too much pressure on the wrong surface. Here is a consolidated reference:
| Surface | PSI | Nozzle | Special Notes |
|---|---|---|---|
| Vinyl siding | 1,500 - 3,000 | 25° | Work with siding seams not against them |
| Wood siding | 500 - 800 max | 40° | Maintain 18-inch distance minimum |
| Brick and masonry | 1,500 - 2,000 | 25° | Pre-soak first |
| Stucco | 1,200 - 1,500 | 40° | Check for hairline cracks before washing |
| Concrete driveway/walkway | 2,500 - 3,000 | 15° or 25° | Heavy-duty cleaning |
| Wood deck | 500 - 600 | 40° | Go with the grain not across it |
| Roof shingles | Under 100 | Soft wash | Use biodegradable cleanser instead |
| Composite decking | Do NOT pressure wash | N/A | Material can be permanently damaged |
Always use the lowest PSI and widest nozzle angle that still gets the job done. You can always move closer or narrow the nozzle if needed. You cannot undo a gouged wood panel or cracked stucco.
This section is one that most how-to guides skip entirely, but it matters. Pressure washing creates wastewater that flows somewhere, and where it goes is regulated.
Under Section 301 of the Clean Water Act (CWA), it is illegal to discharge pollutants into waters of the United States from a point source without a National Pollutant Discharge Elimination System (NPDES) permit. Pressure washing wastewater, even soapy water from a house wash, qualifies as a point source discharge.
The EPA clarifies this directly: wastewater from mobile pressure washing activities must not be discharged into a Municipal Separate Storm Sewer System (MS4) unless authorized by an NPDES permit. Most residential storm drains connect directly to local waterways without any treatment. That means letting your wash water run into the street and down the storm drain is, in many jurisdictions, a violation of federal law.
You can read the EPA’s official position on pressure washing and lead paint containment at: https://www.epa.gov/lead/how-do-rrp-requirements-apply-pressure-washing
The most compliant options for residential homeowners are:
If your home was built before 1978, there is a real chance some of the paint on the exterior contains lead. This is not just a health caution. It is a legal one.
The EPA’s Lead Renovation, Repair, and Painting (RRP) Rule requires that any firm being paid to perform renovation or cleaning work on a pre-1978 home must be certified and follow strict containment procedures. This applies to pressure washing. According to the U.S. EPA RRP Rule guidance, the work area must be fully isolated so that no dust, debris, or wastewater leaves the site.
The Washington State Department of Health notes that pressure washing homes with old lead paint is one of the leading causes of lead contamination in residential environments. Paint chips scatter, runoff carries lead particles into soil and groundwater, and airborne particles can be inhaled.
The practical takeaway: if your home was built before 1978 and has old or peeling paint, do not pressure wash it yourself without testing for lead first. If lead is present, hire a certified contractor. The HUD Lead Safe Housing guidelines strongly recommend against uncontained pressure washing of lead-painted surfaces under any circumstances.
State environmental agencies have published their own guidance documents for power washing wastewater management. Ohio EPA, for example, has a public fact sheet on mobile power washing compliance that outlines how wastewater must be handled: Ohio EPA Power Washing Guidance. Indiana’s IDEM has published similar guidance, and the WSSC Water authority has published Best Management Practices for mobile power washing in the Washington D.C. metro area.
The consistent message across all of these documents: wastewater from pressure washing is considered industrial wastewater and cannot be allowed to reach storm drains or natural water bodies. Check with your local municipality for the specific rules in your area before you start.
The short answer: most experts recommend once a year as a baseline for most homes. But the real answer depends on where you live, what your house is made of, and what it faces seasonally.
The simple rule: when you run a white cloth across your siding and it comes away gray or green, it is past time for a wash.
Both types work for house washing. The choice comes down to scale and convenience.
Electric machines are lighter, quieter, lower maintenance, and fine for most single-story homes. They typically range from 1,300 to 2,000 PSI, which covers vinyl siding, wood, decks, patios, and cars. Since they produce no exhaust, they are the only safe choice for any partially enclosed area. Most good electric models for home use run $100 to $300.
Gas machines deliver higher PSI (2,500 to 4,200) and higher GPM, making them better for large homes, multi-story exteriors, heavily stained concrete, or any surface requiring serious cleaning power. They are louder and require more maintenance (oil changes, fuel storage, carburetor care), but they offer mobility without needing an outlet. Gas machines should always be operated outdoors due to carbon monoxide emissions.
For most homeowners doing an annual house wash on a standard single-story or modestly sized two-story home, an electric machine in the 1,800 to 2,000 PSI range is the right call. For driveways, large two-story homes, or heavily stained surfaces, step up to a gas machine or rent one for the day.
This is the number one mistake. High pressure on the wrong surface strips paint, gouges wood, cracks stucco, blows out window caulking, and forces water behind siding. Always test on a hidden section first and start with a wider angle nozzle.
Siding is designed to shed water downward. When you spray upward into the seams or under the lap of horizontal siding, water gets behind it and can cause rot, mold inside the wall cavity, and insulation damage. Always spray at a slight downward angle or horizontally, never up into joints.
Pressure washers produce recoil. On a ladder, that recoil can throw you backward, and the result is a serious fall. Use a telescoping extension wand for hard-to-reach areas instead. If you need to clean a second-story exterior, rent a rolling scaffold or hire a professional.
Forgetting to cover plants, close windows, or protect light fixtures leads to avoidable damage. Detergent runoff onto plants can cause wilting or death. Water forced into an electrical outlet can cause a short or worse. Prep takes 20 minutes and saves hours of cleanup problems.
Always use cleaners specifically rated for pressure washers. Standard household cleaners can foam excessively in the pump and cause mechanical failure. For environmentally responsible washing, choose citric-based or biodegradable formulas.
Apply soap from the bottom up. Rinse from the top down. This gives the detergent even coverage and lets gravity do the rinsing work.
If you are pressure washing in preparation for painting, wait for the surface to dry completely. Trapped moisture under fresh paint is one of the most common causes of early paint failure. Depending on the weather, this can take 24 to 48 hours.
Soft washing is a lower-pressure method (typically under 100 PSI) that relies on specialized biodegradable cleaning solutions to break down organic growth at the source rather than blasting it off with force. It is the correct method for roofs, older wood siding, painted surfaces with chipping paint, and any surface where high pressure would cause damage.
Traditional pressure washing is the right tool for concrete, driveways, brick, and durable vinyl siding. If you are looking at algae-streaked roof shingles, do not pressure wash them. High PSI will strip the protective granules from asphalt shingles and dramatically shorten the roof’s life. Soft washing with a low-pressure application of sodium hypochlorite or oxygen bleach solution is the industry-approved method for roofs.
Many pressure washing companies offer both services. If your contractor is quoting a roof cleaning and mentioning pressure washing in the same breath, ask specifically about the PSI and method they plan to use.
If you are planning to repaint your home’s exterior, pressure washing beforehand is not optional. It is the most important prep step you can do.
Fresh paint applied over dirty, chalky, or mildew-covered surfaces will fail early, peel unevenly, and not adhere the way it should.
Pressure washing removes chalk residue from old paint, strips loose flaking paint, kills surface mold and mildew, and gives the new paint a clean, even surface to bond to. Most professional painters include or require exterior pressure washing as part of their prep process.
After washing, inspect all caulk lines, trim edges, and joints. Reapply caulk where needed and let it cure fully before painting. Then allow the surface to dry for at least 24 hours.
Let’s break down what each option actually costs.
For a single-story home in clean condition, DIY is genuinely manageable and cost-effective. For a two-story home, a home with lead paint, heavily stained brick or stucco, or surfaces requiring soft washing, a professional is worth the cost.
Just as important as knowing how to pressure wash a house is knowing where not to point the wand.
High pressure strips protective granules and voids most roofing warranties. Use soft washing only.
The material is not designed for direct high-pressure water. Use a garden hose and mild soap.
Pressure can crack the glass or blow out the caulking. A garden hose is enough.
Without containment this is a health and legal issue that requires professional handling.
Water forced into cracks accelerates deterioration. Repair first, wash later.
Even moderate PSI can damage automotive clear coat and paint.
The fins are delicate. Use a garden hose and light spray if cleaning is needed, or hire an HVAC technician.
The two most popular windows are spring (March through June) and early fall (September through October).
After a winter of freezing temperatures, ice, road salt (in colder regions), and accumulated pollen, spring is the natural reset point for your home’s exterior. Late spring, after the bulk of pollen has fallen, is ideal. You get the full benefit of the cleaning going into summer without having to immediately re-wash the pollen season’s deposits.
Fall washing removes summer’s worth of algae growth, insect nests, bird activity, tree sap, and leaf stain before the debris gets locked under winter snow and ice. In humid southern climates, fall washing is especially important to prevent mold from overwintering in the siding.
Avoid pressure washing when temperatures are below 40 degrees Fahrenheit. The water can freeze in the pump housing and cause cracking. In extreme heat above 90 degrees, detergents dry too fast for proper dwell time unless you work in very small sections.
After going through all the research and working through what the top sources recommend, here is what I would suggest for the average homeowner:
Start by testing your exterior for lead paint if the house was built before 1978. This is non-negotiable before doing any pressure washing work. If the test comes back positive, hire a certified contractor.
For everything else: rent or buy a quality electric pressure washer in the 1,800 to 2,000 PSI range for a standard home. Use a 25-degree green nozzle as your default. Apply detergent bottom-up, rinse top-down, keep 12 to 18 inches of distance, and never aim up into siding joints.
I recommend scheduling a full exterior wash once a year in late spring. If you live in a humid climate, add a second lighter wash in early fall. Do your driveways and concrete annually, your deck every one to two years using low pressure, and your roof never with a pressure washer (hire a soft wash service or do it yourself with a low-pressure application of a diluted cleaning solution).
Manage your wastewater responsibly. Direct runoff onto the lawn rather than the street or storm drain. Use biodegradable soaps where possible. Your neighbors, your local watershed, and the law will all appreciate it.
One afternoon of effort once or twice a year is genuinely one of the highest-return maintenance tasks you can do for your home. The curb appeal improvement is immediate, the property value upside is real, and the cost of not doing it, in the form of rotting siding, stained concrete, and algae-damaged roofing, adds up far faster than people expect.
Grab the gear, pick a clear spring morning, and get after it.
U.S. Environmental Protection Agency (EPA): Lead Renovation, Repair, and Painting Rule - https://www.epa.gov/lead/how-do-rrp-requirements-apply-pressure-washing
U.S. Department of Housing and Urban Development (HUD): Guidelines for the Evaluation and Control of Lead-Based Paint Hazards in Housing - https://www.hud.gov/sites/documents/lbph-06.pdf
Ohio Environmental Protection Agency: Mobile Power Washing Environmental Regulations Fact Sheet - https://dam.assets.ohio.gov/image/upload/epa.ohio.gov/Portals/41/sb/publications/powerwash.pdf
Indiana Department of Environmental Management (IDEM): Power Washing Fact Sheet - https://www.in.gov/idem/files/factsheet_ops_outreach_ctap_power_washing.pdf
OSHA Lead in Construction Standard - https://www.osha.gov/sites/default/files/publications/OSHA3142.pdf
Washington State Department of Health: Lead-Based Paint and Remodeling - https://doh.wa.gov/community-and-environment/contaminants/lead/common-sources-lead-poisoning/remodeling-and-painting
WSSC Water: Mobile Cleaner and Power Washing Best Management Practices - https://www.wsscwater.com/sites/default/files/sites/wssc/files/pollution.pdf
Home Depot: How to Pressure Wash a House - https://www.homedepot.com/c/ah/how-to-pressure-wash-a-house/9ba683603be9fa5395fab9017ce6ec7b
Lowe’s: How to Pressure Wash a House - https://www.lowes.com/n/how-to/pressure-wash-your-home-exterior
Bob Vila: How to Pressure Wash a House - https://www.bobvila.com/articles/how-to-pressure-wash-a-house/